

How to Acclimate New Aquarium Plants: Step-by-Step
Table of Contents
- What You'll Need Before You Acclimate Aquarium Plants
- Step 1: Inspect New Plants for Pests, Algae, and Damage
- Step 2: How to Rinse Aquarium Plants Before Planting
- Step 3: How to Quarantine Aquarium Plants
- Step 4: How Long to Acclimate Aquarium Plants
- Step 5: Plant by Type and Avoid Species-Specific Mistakes
- Why Aquarium Plants Melt After Planting (And How to Prevent It)
- Your First Two Weeks: A Post-Introduction Care Schedule
- Frequently Asked Questions
Last Updated: October 21, 2026
What You'll Need Before You Acclimate Aquarium Plants
You've just unboxed a shipment of new plants, and now you need to know how to acclimate new aquarium plants without losing them to shock. The short answer: gather your supplies first, then move slowly.
At Ohenrystanksalot, we ship plants that are already transitioned to underwater growth, which removes a lot of the risk. But even hardy plants need a gentle introduction to your tank.
Here's what you need before you start:
- A clean bucket or bowl (never use soap on it)
- Dechlorinated water at your tank temperature
- Sharp plant scissors
Step 1: Inspect New Plants for Pests, Algae, and Damage
Inspection is the first real step, and it takes five minutes. Check every plant for snails, snail eggs, algae clumps, and brown or mushy leaves.
Look closely at these spots:
- Undersides of leaves (snail eggs hide here)
- Stems near the base (rot starts low)
- Roots and rhizomes (soft spots mean trouble)
Snails are the biggest surprise for most hobbyists. A single hitchhiker can become a population problem within weeks. Pick off anything you see with tweezers.
Damaged leaves are normal after shipping. Yellow or brown edges aren't a death sentence.
Step 2: How to Rinse Aquarium Plants Before Planting
Learning how to rinse aquarium plants before planting is simple: swish each plant in dechlorinated water, not tap water straight from the faucet. Chlorine damages plant tissue just as it harms fish.
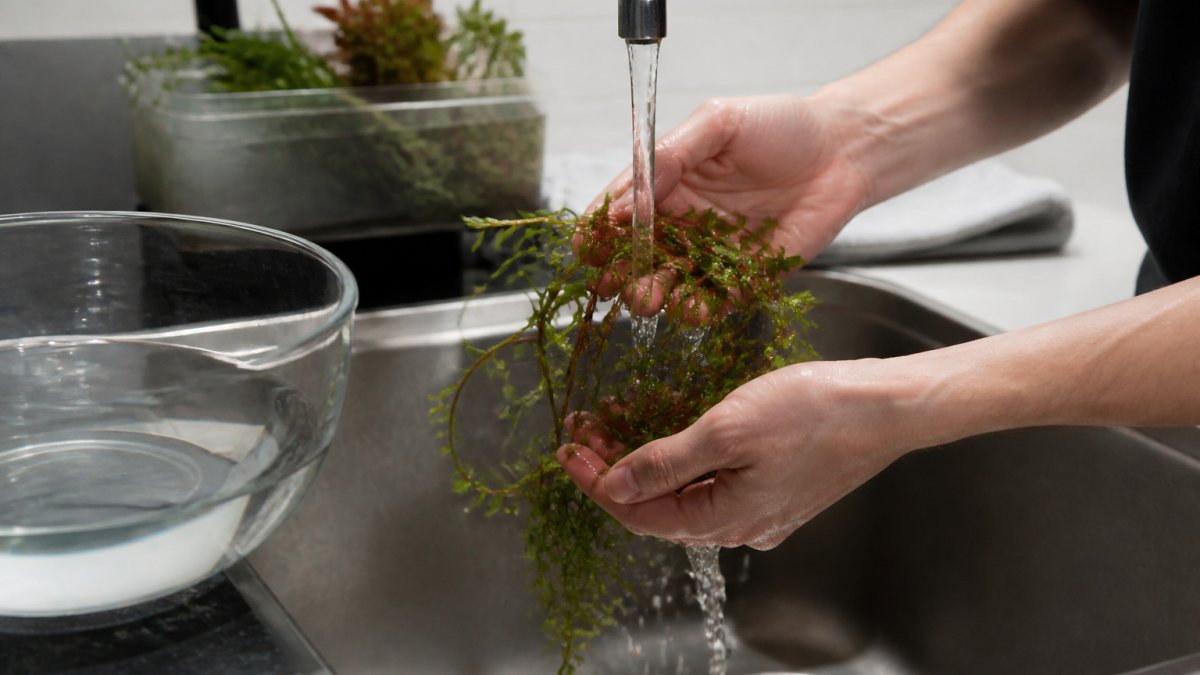
Follow this order:
- Fill a bowl with dechlorinated water at tank temperature
- Hold each plant by the base and swish it gently
- Rub leaves between your fingers to loosen debris
- Rinse again in a second bowl of clean water
- Pat dry on a paper towel
Don't scrub hard. You're removing loose material, not sterilizing the plant.
Removing Rock Wool and Nursery Media
Most plants ship with rock wool, foam, or gel around the roots. Leave it on and the roots can rot, and the plant struggles to anchor in your substrate.
Work the media loose with your fingers, then rinse the roots clean. A pair of tweezers helps with stubborn fibers. Be patient here. Torn roots slow the plant down, but they usually recover.
Step 3: How to Quarantine Aquarium Plants
Knowing how to quarantine aquarium plants protects the tank you already have. A quarantine period of one to two weeks catches pests and disease before they spread, but the length and method should match what you bought and how risky it is.
Set up a simple holding container with:
- Tank water or fresh dechlorinated water
- Low light
- A small airstone for circulation
How Long to Quarantine by Plant Source
There is no single correct duration. Use the source and plant form to set your window:
- Tissue-culture cups: 3-5 days is usually enough. These are grown sterile, so the main risk is gel residue and melt, not pests. Inspect for contamination and remove gel before planting.
- Nursery potted plants (rock wool): 7-10 days. Snail eggs and algae are the common hitchhikers, and a week gives eggs time to hatch where you can see and remove them.
- Loose cuttings or hobbyist trades: 14 days. These carry the highest pest and disease risk because they were grown in open systems.
A common pattern is to quarantine longer than needed and then wonder why plants melt. Holding plants in low light for weeks stresses them. Match the window to the risk, then plant.
Pest-Treatment Options and Trade-Offs
Quarantine alone does not kill pests; it gives you time to see them. If you find snails, algae, or suspicious spots, you have three practical options:
- Manual removal: Pick off snails and eggs with tweezers. Safe for every plant, but slow and never complete.
- Dilute bleach dip: A short dip in a very dilute bleach solution kills algae and many surface pests. The trade-off is real: sensitive plants like mosses, floating plants, and thin-leaved stems can be damaged or killed. Test a single sprig first, and never dip tissue-culture plants.
- Alum or potassium permanganate dip: These are gentler on plants than bleach and target snails and eggs. They still stress delicate species, so reserve them for hardy stems and rosette plants.
When to Skip Quarantine
Skipping quarantine is a calculated risk, not a free pass. It makes sense when you have a single small tank, no established livestock to protect, and plants from a source you trust. It does not make sense if you have a mature display tank, shrimp, or a history of snail outbreaks. In that case, the two-week window is cheap insurance.
Step 4: How Long to Acclimate Aquarium Plants
The question of how long to acclimate aquarium plants comes down to temperature. Plan on 15 to 30 minutes for floating, then a few days of gradual light adjustment.
Temperature Acclimation and Floating the Bag
Float the bag, unopened, in your tank for 15 to 20 minutes. This lets the water inside slowly match your tank temperature.
After floating, open the bag and add a little tank water every 10 minutes for about half an hour.
Then lift the plants out and plant them. Never dump shipping water into your tank. It can carry pests and hitchhikers.
Step 5: Plant by Type and Avoid Species-Specific Mistakes
Planting technique depends on the plant, and getting this wrong causes most of the failures we hear about. Here's how to handle the common types.
- Stem plants: Strip the bottom leaves, then push the stem into the substrate. Don't bury more than an inch.
- Cryptocoryne: Bury the roots, but keep the crown above the substrate. Crypts are slow to settle and may melt back first.
- Anubias and Java fern: Never bury the rhizome. Tie it to wood or rock with thread, or wedge it into a crevice.
A common mistake is burying the rhizome on Anubias and Java fern.
Our 8 Plant Variety Pack mixes stems, a sword, a crypt, an epiphyte, and a fern, so you can practice each planting method in one order. If you want more room to experiment, the 12 Plant Variety Pack covers a wider spread.

For a forgiving carpet plant, Cryptocoryne Parva handles almost any light level. Ludwigia Repens "Narrow Leaf" grows fast and shows color under medium light.

Why Aquarium Plants Melt After Planting (And How to Prevent It)
Plant melt is the sudden loss of leaves after a plant moves to a new tank. It happens because the plant is rebuilding leaves suited to your water, light, and flow. The key skill is telling normal melt apart from a problem you can fix.
Normal Melt vs. a Sick Plant
Normal melt follows a predictable pattern:
- Older, outer leaves yellow and go translucent first
- The crown and roots stay firm and pale
- New growth appears from the center or tips within one to two weeks
A sick plant looks different:
- The crown or rhizome turns soft, brown, or mushy
- The smell is sour or rotten
- Leaves dissolve from the base up, not the outside in
If you see the second set of signs, the cause is usually buried rhizome, crown rot, or a big parameter swing, not normal melt.
The Emersed-to-Submerged Transition
Most nursery plants are grown emersed, with leaves above water. Those leaves are built for air, not water. When you submerge them, the plant sheds them and grows new submerged leaves.
Tissue-culture plants go through the same shift. They arrive small and often melt back hard in the first week. That is expected. Keep them stable and they push new growth from the crown.
A Recovery and Trimming Plan
When melt starts, resist the urge to move the plant. Stability beats intervention.
- Trim dead leaves at the base. Use clean scissors and cut translucent or brown leaves where they meet the stem or crown. Do not pull, which can uproot the plant.
- Leave roots and crown alone. Roots often look dead but recover. Disturbing them resets the clock.
- Hold light steady. Six hours a day for the first week, then add an hour each week. Do not blast a melting plant with light to "help" it.
- Skip big water changes. Small, regular changes are fine. Large swings slow recovery.
- Wait two weeks before judging. If the crown is firm and you see new growth, the plant is fine. If the crown is mushy, remove the plant before it fouls the water.
This is where starting with transitioned plants helps. Our plants are grown without CO2 and most are already transitioned to underwater growth, so they arrive ready to settle in rather than rebuilding from scratch.
Your First Two Weeks: A Post-Introduction Care Schedule
A steady schedule beats guesswork. Here's a simple plan to follow after planting.
| Day | Light | Feeding | What to Check |
|---|---|---|---|
| 1-3 | 6 hours | None | Melt, floating stems |
| 4-7 | 6-7 hours | None | New growth, snails |
| 8-10 | 7 hours | Light root tabs | Algae spots |
| 11-14 | 7-8 hours | Root tabs | Anchoring, color |
Keep your filter running and your temperature steady. Skip fertilizers for the first few days so algae doesn't get a head start.
The U.S. Environmental Protection Agency's guidance on aquatic ecosystems is a useful reference for understanding water quality basics, and the U.S. Fish and Wildlife Service invasive species resources explains why rinsing and quarantining matter beyond your own tank. The Aquatic Plant Management Society also publishes practical material on plant health.
Acclimating new plants takes patience, but the payoff is a tank that fills in instead of fading out. Ohenrystanksalot ships same-day for overnight orders, packs with insulation and heat or cold packs at no extra cost, and backs every order with an Arrive-Alive Guarantee and 7-day Thrive Policy.
Frequently Asked Questions
Do aquarium plants need acclimatization?
Yes, new aquarium plants benefit from acclimation. Moving from shipping conditions or nursery water into your tank exposes them to different temperature, pH, and hardness. A gradual adjustment reduces shock and lowers the chance of melt. The process takes about 15 to 30 minutes for temperature matching, plus a rinse and inspection before planting. Plants shipped in insulated boxes with heat or cold packs arrive stressed, so give them a slow transition rather than dropping them straight into the tank.
How long should new aquarium plants acclimate?
Temperature acclimation usually takes 15 to 30 minutes of floating the plant bag in your tank. After that, drip or cup in small amounts of tank water over another 15 to 20 minutes. The full adjustment period, meaning the weeks your plant needs to settle and show new growth, runs two to four weeks. During that window keep lighting moderate and watch for melting leaves. Fully transitioned plants from Ohenrystanksalot typically settle faster because they are already grown underwater.
Should you quarantine new aquarium plants before adding them to a tank?
Quarantining is worth the extra step if you have shrimp, snails, or a heavily stocked tank. A separate container with tank water and a light for 3 to 7 days lets you spot hitchhikers like pond snails, hydra, or algae. Inspect daily and remove anything suspicious. If you find pests, treat with a plant-safe dip before planting. Skipping quarantine is fine for a brand-new setup with no livestock, but established tanks benefit from the buffer.
How do you prevent new aquarium plants from melting?
Melt usually comes from sudden changes in temperature, light, or water chemistry, or from burying the rhizome of plants like Anubias and Java fern. Rinse off nursery media, acclimate slowly, and plant rhizomes above the substrate. Keep the first week's lighting at roughly 6 to 8 hours and skip heavy fertilization until you see new growth. Choose plants already transitioned to underwater growth, such as the 8 Plant Variety Pack ($45.00), to reduce melt risk from the start.